Datacenter Simulator
Simplify Data Center complicity for Educational Objective
Introduction: What is Simulation?
Simulation: is a powerful and important tool provides a way in which alternative designs, plans and policies can be evaluated without having to experiment on a real system, which may be prohibitively costly, time-consuming, or simply impractical to do.
What Is DC Simulator
-
1. An Educational powerful 3D modeling Data Center simulator
Offers the student a comprehensive, creative toolset for creating and simulating data centers.
-
2. Complete real view of actual Data Center
Provide a starting point to give the student full imagination and ability to Design and Plan an Ideal Data Center in 3D view.
-
3. Install, Configure and Manage
Give the student capability to install, configure and manage complete Data Center with having full simulation for 4 levels (Infrastructure, Server, Network and OS).
WHY Data Center Simulator?
- 1. Prepare and Give the IT student tools to help him understand and work on an actual Data Center.
- 2. Deliver latest technology in the IT world with the ability to build, create and Design Data Center in a practical way supportive of theoretical concepts
- 3. Introduce students to the components of the data center at different levels and how to install, Configure and Manage it
- 4. Providing full 3D simulator to give the student imagination of real Data Center Without the need of building specific one for educational perception.

How is works?

What it delivers?
-
1. Infrastructure Simulation
Drag-Drop necessary equipment to design the infrastructure: - • Place power, UPS, Connect power source.
- • Raised Floor, Fire Fighting System, UPS, AC, etc.
- • Rack Cabinet
-
2. Network Simulation
Drag-Drop necessary Network devices with connection option: - • Connect the devices to the management switches.
- • Connect the devices between the racks to the network devices.
- • Having ability to ping and analysis bottle neck
-
3. Server & Storage Simulation
Drag-Drop necessary servers and storages: - • Choosing Server & Storage.
- • Place Server in the Cabinet.
- • Connect power source, Network Cables.
- • Connect with the storages or the backup devices.
-
4. OS Simulation
Student by double clicking on the server will choose the OS: - • Windows server Editions.
- • Linux.
-
5. Teacher Operations
- • Is the administrator on the student level?
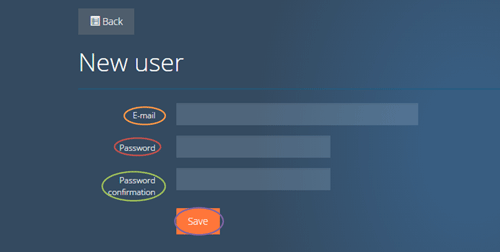
- • Have the tool to add/remove students generate user name/password.
- • Ability to monitor all the students in the class and see their projects through list shows the names.


Benefits
- Business Impact
- Teacher
- Student

Business Impact (University)

Teacher

Student
The structure of the program

What will provide
- 1. Admin Experience.
- 2. Student Experience
Welcome Page

Log-in As Administrator
Administrator‘s functions will be:
• Add / Remove / Edit / Monitor each student Project.
• Add / Remove / Edit / Monitor Teachers.
• Create new Admin.
• Import of Components.

Log-in As Administrator / Monitoring Students.


Log-in As Administrator / Editing or Adding new Admin.


Log-in As Administrator / Import list of Students.

Log-in As Administrator / Excel template to Import the students.

Log-in As Administrator / Import of components.

Login Interface:
• Each student will have his own Username & Password.

Parameters Configuration:
After login to the application, student will be able to define:
• Project Name.
• Width of the floor.
• Depth of the floor.
• Define IP Ranges (Network, Management, Etc...).

Infrastructure Design:
After define the parameters, student will be able to:
• Design the Data Center infrastructure.
• Rotate, zoom, navigate, Edit and Delete options.
• Drag and Drop the units shown in the toolbar with description for each one.

Infrastructure Design:
After Drag-N-Drop the object Dialog will appear contains details and optional configuration:
• General information about the object.
• Picture.
• Configuration Guide .
• URL for Video.
• URL for Data Sheet.

Hardware Installation:
After Drag-N-Drop Server Cabinet, student will be able:
• To see inside the cabinet by clicking on it.
• Start the Hardware Installation, by Drag-N-Drop the objects.

Connectivity Design:
After Drag-N-Drop Objects inside the cabinet, student will be able:
• To make connectivity design by connecting.
• Power with the Hardware / Server with Switches / Switches with Firewalls / and Etc.…
• Student will be able distinguish between connectivity by the colors.

Software Installation:
After Drag-N-Drop Servers inside the cabinet, student will be able:
• To choose the operation system want to install (Windows / Linux).
